How to Repair Car Interior Door Trim Panel
The interior door trim panel of a car serves both functional and aesthetic purposes. It covers the inner door frame, providing a finished look to the interior. However, this panel can become damaged over time due to wear and tear, accidents, or weathering. Fortunately, repairing the interior door trim panel is a relatively easy task that can be completed at home with the right tools and materials.
Tools and Materials Required
Before starting the repair, gather the necessary tools and materials:
- Small flat-head screwdriver
- Phillips-head screwdriver
- Trim panel removal tool (optional but recommended)
- New door trim panel clips (if needed)
- Adhesive or epoxy (if needed)
- Sandpaper or rubbing compound (if needed)
- Clean rags
Steps for Repairing the Interior Door Trim Panel
1. Remove the Door Trim Panel
Start by carefully removing the door trim panel. Use a trim panel removal tool or a flat-head screwdriver to gently pry the panel loose from its clips. Avoid using excessive force that could break the clips.
2. Inspect the Damage
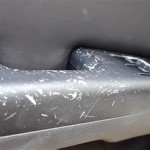
Once the panel is removed, inspect it for damage. Common issues include scratches, cracks, broken clips, or loose areas. Determine the nature of the damage to decide on the appropriate repair method.
3. Repair Scratches and Cracks
If the trim panel has minor scratches or cracks, you can repair them using sandpaper or a rubbing compound. Lightly sand the affected area in a circular motion until the scratch or crack is less noticeable. Use a clean rag to wipe away any dust or debris.
4. Replace Broken Clips
If any of the panel's clips are broken, they need to be replaced. Use a pair of pliers or a small screwdriver to remove the old clips and insert new ones in their place. Ensure that the new clips fit securely.
5. Secure Loose Areas
If the panel has become loose in certain areas, you can secure them using adhesive or epoxy. Apply a small amount of adhesive or epoxy to the loose areas and press them firmly back into place. Hold the panel in place for a few minutes until the adhesive or epoxy has set.
6. Reinstall the Door Trim Panel
Once the damage has been repaired, reinstall the door trim panel. Align the panel with the door frame and gently push it into place until the clips snap securely. Use a Phillips-head screwdriver to tighten any screws that may have loosened during the removal process.
Additional Tips
- Be patient and take your time throughout the repair process.
- If you are not confident in your repair skills, consider consulting a professional mechanic or body shop.
- Replace the entire trim panel if the damage is extensive or cannot be repaired effectively.
- Protect the interior of your car by covering the seats and floor with a drop cloth or old towels.

How To Fix Scratched Interior Panels In Your Car Holts Auto Site

Easy Way To Repair This Door Panel Yourself Here I Show You

Door Panel Trim Adhesive Ford Explorer How To Repair With Glue

How To Remove A Door Panel From Car 12 Steps With Pictures

Interior Door Panel Restoration Classic Muscle Car Repair A Vinyl Or Leather Tear Duplicolor Dye

Fix Re Faded Plastic Door Panels Interior Trim Pieces Car Truck 10 Min Repair Any Vehicle

How To Remove A Door Panel On Any Car Removal

How To Remove A Door Panel From Car 12 Steps With Pictures

How To Diy Door Panel Fabric Inserts

How To Remove A Door Panel From Car 12 Steps With Pictures
Related Posts


