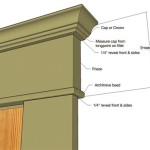
How To Remove an Interior Window Sill
Interior window sills are often overlooked but they play a vital role in protecting the interior of your home from moisture and damage. They are also a key element in the overall aesthetics of a room. Over time, however, window sills can become damaged, chipped, or simply outdated. If you need to replace or repair an interior window sill, the first step is to remove it. This process may seem daunting, but with the right tools and techniques, it can be done relatively easily.
Tools and Materials
Before you begin, gather the necessary tools and materials. You will need:
- A screwdriver (flathead and Phillips)
- A pry bar or putty knife
- A hammer (optional)
- Safety goggles
- Work gloves
- A drop cloth or old towel
- A utility knife (optional)
Steps for Removing an Interior Window Sill
The specific steps for removing an interior window sill can vary depending on the type of sill and how it is installed. However, the following steps provide a general guideline:
1. Prepare the Work Area
Clear the area around the window sill. Remove any furniture or decorations that could obstruct your work. Cover the floor beneath the window with a drop cloth or an old towel to protect it from scratches or debris.
2. Remove the Trim
If the window sill is attached to the window trim, you will need to remove the trim first. Carefully pry off the trim using a pry bar or putty knife. Start at one end of the trim and work your way along, gently prying it away from the wall. Be careful not to damage the trim or the surrounding wall.
3. Locate the Fasteners
Examine the window sill to locate the fasteners holding it in place. The fasteners may be screws, nails, or clips. If you can't find any visible fasteners, the sill may be glued or nailed directly to the window frame. If the sill is glued down, there may be no easy way to remove it without damaging the window frame.
4. Remove the Fasteners
Use a screwdriver to remove the fasteners that hold the window sill in place. If the fasteners are screws, simply unscrew them. If they are nails, use the hammer to carefully tap them out. If the sill is clipped in place, you may need to use a pry bar or putty knife to release the clips.
5. Pry Off the Window Sill
Once you have removed the fasteners, you can start to pry off the window sill. Use a pry bar or putty knife to gently pry the sill away from the wall. Work slowly and carefully, applying pressure evenly to avoid damaging the window frame or the wall.
6. Remove Any Remaining Residue
After removing the window sill, you may find some remaining adhesive or caulk. Use a utility knife to scrape away any excess residue. You may also need to use a solvent or cleaner to remove stubborn adhesive.
Tips for Removing the Sill
Here are some additional tips for removing an interior window sill:
- If you are unsure about the best way to remove the sill, consult with a professional contractor or handyman. They can provide you with advice and guidance.
- Always wear safety goggles and work gloves when working with tools.
- If the sill is old or brittle, it may be more difficult to remove without damage. In this case, you may want to consider hiring a professional.
- If you are replacing the window sill, take careful measurements of the old sill before removing it. This will help you ensure that the new sill fits perfectly.
By following these steps and tips, you can successfully remove an interior window sill and prepare for a new installation or repair. Remember to approach the task with caution and patience, and always prioritize safety while working with tools.

How To Replace An Interior Window Sill And Trim Roofing Contractor Nj Chimney Sweep Siding Masonry New Jersey

Removing Tile From The Window Sill

Replacing A Window Stool And Apron Interior Sil

How To Replace A Window Sill Marble Replacement

Removing Tile From The Window Sill

How To Replace An Interior Window Sill And Trim Craving Some Creativity

How To Replace An Interior Window Sill Two Purple Couches

How To Replace An Interior Window Sill And Trim Craving Some Creativity

Why Mdf Is No Good Replacing Water Damaged Window Cill

How To Trim A Window Sill Exquisitely Unremarkable
Related Posts


