Tips for Painting Your Home Interior Like a Pro
Painting the interior of a home is a common yet impactful way to refresh the living space. A well-executed paint job can significantly improve the aesthetics, increase property value, and even create a more comfortable atmosphere. However, achieving a professional-looking finish requires meticulous preparation, careful planning, and the right techniques. This article provides practical tips to guide you through the process of interior painting, ensuring a satisfactory and lasting result.
Preparation is Paramount
The success of any painting project hinges on thorough preparation. Neglecting this crucial step can lead to uneven paint application, poor adhesion, and ultimately, a less-than-desirable outcome. Allocate sufficient time and resources to properly prepare the surfaces before even opening a can of paint.
Begin by protecting the surrounding areas. Cover furniture with drop cloths made of canvas or plastic. Canvas drop cloths are reusable and more durable, while plastic drop cloths are lightweight and disposable. Secure the drop cloths with painter’s tape to prevent them from shifting during the painting process. Remove any wall decorations, such as pictures, mirrors, and shelves. Consider removing light fixtures as well, or carefully cover them with plastic sheeting and tape.
Surface preparation is equally important. Start by cleaning the walls with a mild detergent and water solution. Remove any dirt, dust, grease, or mildew. Pay particular attention to kitchens and bathrooms, where grease and moisture are more prevalent. Rinse the walls with clean water and allow them to dry completely before proceeding.
Inspect the walls for any imperfections, such as cracks, holes, or dents. Use spackle or joint compound to fill these imperfections. Apply the filler smoothly and evenly, using a putty knife. Allow the filler to dry completely according to the manufacturer's instructions. Once dry, sand the filled areas smooth with fine-grit sandpaper. Feather the edges of the repair to blend seamlessly with the surrounding surface. Wipe away any sanding dust with a damp cloth.
Priming is an essential step, especially on bare drywall, patched areas, or surfaces with dark or glossy paint. Primer provides a uniform surface for the paint to adhere to, improves paint coverage, and seals porous surfaces. Choose a primer that is appropriate for the type of surface you are painting. Apply the primer evenly, using a brush or roller. Allow the primer to dry completely before applying the paint.
Painter's tape is your ally in achieving clean, crisp lines. Apply painter's tape along edges of trim, windows, doors, and ceilings. Ensure the tape is firmly adhered to the surface to prevent paint from bleeding underneath. Use a putty knife or a credit card to press the tape firmly in place. Remove the painter’s tape shortly after applying the final coat of paint, before it is completely dry. This will help prevent the paint from peeling or chipping. When removing the tape, pull it away at a 45-degree angle.
Selecting the Right Tools and Materials
Choosing the right tools and materials is crucial for achieving a professional-looking paint job. Invest in high-quality brushes, rollers, and paint to ensure a smooth and even finish. Cheap brushes and rollers can shed bristles or create uneven textures on the wall.
Paintbrushes come in various sizes and shapes, each designed for specific purposes. Angled brushes are ideal for cutting in edges and painting trim, while flat brushes are suitable for painting large surfaces. Choose a brush with synthetic bristles for latex paint and a brush with natural bristles for oil-based paint. Clean brushes thoroughly after each use to prolong their lifespan.
Rollers are essential for painting large surfaces quickly and efficiently. Choose a roller cover with the appropriate nap length for the texture of your walls. Smooth walls require roller covers with shorter nap lengths, while textured walls require roller covers with longer nap lengths. Use a roller frame with an extension pole to reach high walls and ceilings without having to use a ladder. Clean rollers thoroughly after each use to prevent paint from drying on the cover.
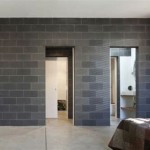
Paint comes in a variety of finishes, each with its own characteristics and suitability for different areas of the home. Flat paint has a matte finish and is ideal for low-traffic areas, such as bedrooms and living rooms. Eggshell paint has a slight sheen and is more durable than flat paint, making it suitable for hallways and dining rooms. Satin paint has a higher sheen and is more resistant to moisture and stains, making it ideal for kitchens and bathrooms. Semi-gloss paint has a high sheen and is very durable, making it suitable for trim, doors, and cabinets. Gloss paint has the highest sheen and is extremely durable, but it can highlight imperfections on the surface.
The type of paint you choose is also important. Latex paint is water-based, easy to clean up, and low in VOCs (volatile organic compounds). Oil-based paint is more durable and provides a smoother finish, but it is more difficult to clean up and contains higher levels of VOCs. Acrylic paint is a type of latex paint that is more durable and resistant to fading. Consider the specific needs of each room when selecting the type of paint.
Other essential tools and materials include a paint tray, a paint can opener, a stirring stick, a ladder, a drop cloth, painter's tape, spackle or joint compound, a putty knife, sandpaper, a damp cloth, and safety glasses.
Applying the Paint with Precision
Proper paint application techniques are crucial for achieving a professional-looking finish. Applying the paint evenly and smoothly will ensure consistent color and coverage.
Begin by "cutting in" along the edges of the walls, trim, ceilings, and windows. Cutting in involves painting a narrow strip along these edges with a brush, creating a clean and defined line. Use an angled brush for precise control. Work in small sections, applying the paint evenly and smoothly. Avoid applying too much paint, as this can lead to drips and runs.
Once you have finished cutting in, begin rolling the paint onto the walls. Dip the roller into the paint tray, ensuring that the roller cover is evenly coated. Avoid overloading the roller, as this can lead to drips and splatters. Start rolling the paint in a "W" or "M" pattern, overlapping each stroke slightly. This will help to ensure even coverage and prevent streaking. Maintain a wet edge, blending each section of paint as you go.
Apply two coats of paint for optimal coverage and durability. Allow the first coat to dry completely before applying the second coat. Follow the manufacturer's instructions for drying time. Lightly sand the walls with fine-grit sandpaper between coats to remove any imperfections and create a smoother surface for the second coat.
Pay attention to detail throughout the painting process. Check for drips, runs, and missed spots. Touch up any imperfections as needed. Maintain a clean work area by wiping up any spills or splatters immediately. Keep your tools and materials organized to prevent accidents and ensure a smooth workflow.
Proper ventilation is essential when painting, especially when using oil-based paints or paints with high levels of VOCs. Open windows and doors to allow fresh air to circulate. Use a fan to help circulate the air and speed up the drying process. If possible, paint during the warmer months when it is easier to open windows and doors.
After completing the painting project, allow the paint to dry completely before replacing furniture and wall decorations. Carefully remove the drop cloths and painter's tape. Clean your brushes, rollers, and paint trays with soap and water (for latex paint) or mineral spirits (for oil-based paint). Store leftover paint in airtight containers in a cool, dry place.
Achieving a professional-looking paint job requires patience, attention to detail, and the right techniques. By following these tips, homeowners can transform their living spaces with a fresh coat of paint and enjoy the benefits of a well-executed interior painting project.

Tips On Painting Your Interior Remy Refinishing Lincoln Nebraska

Simple Wall Painting Ideas To Make Your Home Shine

Diy Interior Wall Painting Tips Techniques With Pictures Family Handyman

The Top Interior Paint Colors For A Modern And Stylish Home

Professional Interior Painting In Tucson Paint Kings

Expert Tips For Choosing The Interior Design Paintings Your Home

How To Quickly Neatly Paint An Entire Room Tri All

Interior House Painting Tips That Will Refresh And Modernize Your Home Alexander Renovations Princeton Nj

Tips For Choosing The Best Color Your Interior Project

Creative Home Painting Ideas To Add Colour Your
Related Posts