How to Trim Around Windows: Interior Designers in Sweden Offer Free Advice
Giving a room a finished and polished look often comes down to the details, and trim around windows is one of those details that can make a big difference. Whether you're renovating, redecorating, or simply looking to refresh a room, understanding how to trim around windows can significantly enhance the room's aesthetic appeal. While hiring a professional is always an option, seeking advice from interior designers in Sweden can be a free and valuable way to learn the basics of trimming around windows.
Choosing the Right Trim
The first step in trimming around windows is selecting the right type of trim. Sweden boasts a diverse range of interior design styles, from minimalist Scandinavian to classic country, and the trim choice should complement the chosen aesthetic. Consider the following factors:
-
Style:
Popular choices include traditional crown molding, intricate casings, and simple flat trims. Consider the overall style of the room and house when deciding on the trim profile. -
Material:
Trim can be made from wood, plastic, or even composite materials. Wood is a classic choice, offering a natural look and durability, while plastic is more budget-friendly and easier to maintain. -
Finish:
The finish of the trim can significantly impact the overall look. Options include painted, stained, or even textured finishes. -
Width:
The width of the trim influences the visual impact. Narrow trims create a subtle finish, while wider trims add more visual interest and can make small windows appear larger.
Interior designers in Sweden can offer valuable insights into choosing the right trim for your project. They can analyze the existing style of your home, provide recommendations based on current trends, and help you find materials that match your budget and aesthetic preferences.
Measuring and Cutting the Trim
Once you've chosen the trim, the next step is to measure and cut it to size. This requires precision and specialized tools to ensure a clean and professional finish.
-
Measuring:
Use a measuring tape to determine the exact length of trim needed for each side of the window. It's crucial to measure accurately to ensure the trim fits perfectly. -
Cutting:
A miter saw is the ideal tool for cutting trim accurately and at precise angles. This is particularly important for corners and mitered joints. If a miter saw is unavailable, a hand saw and miter box can be used, although it requires more skill and precision. -
Marking:
Prior to cutting, use a pencil to mark the cut lines on the trim to ensure accuracy.
Interior designers can educate you on the proper techniques for measuring and cutting trim, and they can offer practical advice on using tools like miter saws safely and effectively. They can also point you towards helpful resources and tutorials available online or in home improvement stores.
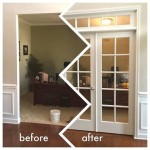
Attaching the Trim
The final step is attaching the trim to the window frame. This involves careful alignment and secure fastening to ensure a durable and visually appealing finish.
-
Start at the top:
Begin by attaching the top piece of trim to the window frame. Use a level to ensure it's straight and level. -
Attaching the sides:
Once the top piece is secured, attach the side pieces, aligning them with the top piece and using a level to ensure they are straight. -
Securing the trim:
Use a nail gun, finish nailer, or wood glue to attach the trim to the window frame. Be sure to countersink the nails or use glue that dries clear to avoid visible fasteners. -
Caulking:
After attaching the trim, use caulk to fill gaps between the trim and the wall or window frame. This creates a seamless and professional finish.
Interior designers can provide valuable guidance on the best techniques for attaching trim, including recommendations for tools and fasteners based on the type of trim and the material of the window frame. They can also advise on proper caulking techniques to ensure a smooth and clean finish.
While trimming around windows may seem like a simple task, it requires precision, attention to detail, and a bit of know-how. Consulting with interior designers in Sweden can provide you with the knowledge and confidence to tackle this project successfully, adding a professional touch to your home's interior.
:strip_icc()/cdn.cliqueinc.com__cache__posts__249310__scandinavian-remodel-249310-1518502542784-image.700x0c-1b39c9c2891c4eae8eeb190b295998f4.jpg?strip=all "Small Space Scandinavian Design Tricks To Copy Asap")
Small Space Scandinavian Design Tricks To Copy Asap

Scandinavian Curtains For A Hygge Inspired Home The Shade

Everything You Need To Know About Door And Window Trim Remodeling 101 Remodelista

How To Wallpaper Around A Window Like Pro Hovia

Scandinavian Curtains For A Hygge Inspired Home The Shade

Window Treatment Solutions To Dress Arched Windows Odd Shaped

Wood Mouldings Trims Flooring Period Style Renovation

Scandinavian Window Treatments Style With Spiffy Spools

Scandinavian Interior Design How The Happiest People On Earth Decorate Posh Pennies

What 039 S Changed For The 5 Evergreen And Latest House Designs In 2024
Related Posts