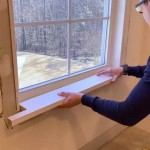
How to Replace Trim Around Windows Interior
Your window trim is a stylish element that links the window to the rest of your home's inside. It comes in various designs and materials to match your unique taste and décor.
Over time, window trim can become worn, damaged, or outdated. Replacing it is an effective way to enhance the appearance of your room and protect your windows from drafts and moisture.
Here's a step-by-step guide to help you replace trim around windows interior:
Step 1: Prepare the Area
Begin by removing any existing curtains, blinds, or other window coverings. Then, spread a drop cloth or tarp on the floor to protect it from debris.
Step 2: Remove the Old Trim
Use a pry bar or a flathead screwdriver to gently pry the old trim away from the wall and window frame. Be careful not to damage the drywall or window casing.
Step 3: Measure and Cut New Trim
Measure the width and length of the window opening. Transfer these measurements to the new trim and cut it to size using a miter saw or a handsaw with a miter box.
Step 4: Cut Miter Joints
If your window has corners, you'll need to cut miter joints to create a seamless fit. Use a miter saw or a miter box and set it to a 45-degree angle.
Step 5: Dry Fit the Trim
Place the new trim around the window opening and check for a snug fit. Adjust the cuts as necessary to ensure there are no gaps.
Step 6: Secure the Trim
Apply a thin layer of construction adhesive to the back of the trim. Position it around the window and secure it with nails or screws. Countersink the nails or screws slightly below the surface.
Step 7: Fill Nail Holes and Gaps
Use wood filler to fill any nail or screw holes and gaps between the trim and the wall. Allow it to dry and sand it smooth.
Step 8: Paint or Stain the Trim
If desired, paint or stain the trim to match the wall or décor. Use a high-quality brush or roller to apply multiple thin coats.
Tips:
- Use a level to ensure the trim is straight and level.
- Caulk any gaps between the trim and the wall or window frame to prevent drafts and moisture.
- Choose a trim that complements the style of your home and windows.
- Consider the material of the trim, such as wood, MDF, or vinyl, based on its durability, moisture resistance, and cost.
Replacing window trim is a straightforward project that can significantly enhance the aesthetics of your room. By following these steps, you can achieve a professional-looking finish that will protect your windows and add value to your home.

How To Install Window Casing And Interior Trim

How To Trim A Window Diy Step By Guide Perfect Casings

How To Trim A Window The Home Depot

Minimalist Window Trim How To No More Ugly

Home Improvement How To Add Trim Around An Interior Window Sill Apron

How To Install Window Trim Simple Craftsman

How To Trim A Window The Home Depot

How To Diy Window Trim Custom High End Finishes On A Budget

Installing Interior Window Trim Beginner

How To Update Window Trim Angela Marie Made
Related Posts


