How to Replace Interior French Doors
Replacing interior French doors can significantly enhance the aesthetic appeal and functionality of a home. This project, while manageable for experienced DIY enthusiasts, requires careful planning, precise measurements, and the proper tools. This article provides a comprehensive guide to replacing interior French doors, covering everything from preparation to installation, ensuring a successful outcome.
Preparing for the Replacement
The initial phase of replacing interior French doors involves careful planning and preparation. This stage is crucial for minimizing errors and ensuring a smooth installation process. It includes assessing the existing door frame, selecting the appropriate replacement doors, and gathering the necessary tools and materials.
The first step is to thoroughly inspect the existing door frame, also known as the jamb. Examine it for any signs of damage, such as rot, warping, or cracks. These issues may require repair or replacement before installing the new doors. Pay close attention to the condition of the door stops and the hinges.
Accurate measurements are paramount. Measure the width and height of the existing door opening at several points to ensure the opening is square. If the opening is not perfectly square, adjustments may be necessary during the installation process. Record these measurements precisely, as they will be used to select the appropriate size for the replacement doors. It is recommended to measure to the nearest 1/8 inch.
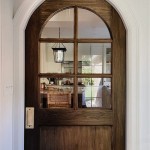
Selecting the right replacement doors involves considering several factors, including the style, material, and size. French doors are available in various styles, ranging from traditional to contemporary. Consider the overall aesthetic of the home and choose doors that complement the existing decor. Common materials include wood, fiberglass, and steel. Wood offers a classic look but requires more maintenance. Fiberglass is durable and resistant to weather, while steel provides enhanced security. Ensure the replacement doors are pre-hung, meaning they are already installed in a frame, as this simplifies the installation process. Verify the swing direction of the new doors matches the original setup or is suitable for the intended use of the room.
Gather all the necessary tools and materials before starting the project. Essential tools include a level (both a short and a long one), a measuring tape, a pencil, a utility knife, a hammer, a screwdriver (both manual and power drill/driver), shims, safety glasses, work gloves, and a pry bar. Materials required include the replacement French doors, finishing nails or screws, wood filler (if needed), paint or stain (if desired), and caulk. Having all these items readily available will prevent delays and ensure a more efficient workflow.
Removing the Existing French Doors
The next step is safely removing the existing French doors. This process requires careful handling to avoid damaging the door frame or surrounding walls. It involves disconnecting the doors from the hinges, removing any trim, and extracting the old door frame.
Begin by placing shims under the doors to support their weight and prevent them from swinging unexpectedly during removal. Use a hammer and screwdriver to gently tap the hinge pins upwards from the bottom. If the pins are stubborn, a specialized hinge pin removal tool can be used. Once the hinge pins are removed, carefully detach the doors from the frame. It is advisable to have a helper assist with this step, as French doors can be heavy and unwieldy.
After removing the doors, use a utility knife to score the paint or caulk along the edges of the existing door frame. This prevents the paint from peeling off the wall when the frame is removed. Use a pry bar to gently pry the frame away from the wall studs. Start at the top and work your way down, being careful not to damage the surrounding drywall. If the frame is nailed in place, use the pry bar to carefully lift the nails out. Once the frame is loose, remove it from the opening.
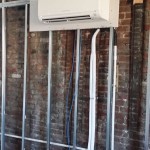
Inspect the exposed wall studs for any signs of damage, such as rot or insect infestation. If any issues are found, address them before proceeding with the installation of the new doors. Ensure the opening is clean and free of debris. Remove any old nails, screws, or shims that may be present.
Consider the rough opening. The integrity of the rough opening is very important. Check and make sure that the studs are straight as they can be, and level and square. If the rough opening is uneven in any way then you will have a hard time installing the new doors. This will be time consuming and lead to problems in the future, such as problems with the door swinging open or closed on its own. This can also lead to problems keeping the door locked.
Installing the New French Doors
The installation of the new French doors is a critical step that requires precision and attention to detail. This process involves positioning the new door frame, ensuring it is plumb and level, securing it to the wall studs, and making any necessary adjustments.
Carefully position the new pre-hung French door unit into the prepared opening. Ensure the unit is centered and that the door swing direction is correct. Use shims to adjust the position of the frame until it is perfectly plumb (vertically straight) and level (horizontally straight). Place shims behind the frame at the hinge locations, strike plate location, and along the top and bottom. Use a level to check the plumbness and levelness of the frame at multiple points. The goal is to achieve a consistent and even gap between the door and the frame.
Once the frame is properly positioned, secure it to the wall studs using finishing nails or screws. Start by securing the hinge side of the frame, ensuring the door swings smoothly and freely. Pre-drill pilot holes through the shims and into the studs to prevent the wood from splitting. Use screws that are long enough to penetrate the studs securely. Check the plumbness and levelness again after each screw is installed to ensure the frame has not shifted. Repeat this process on the strike plate side of the frame.
After securing the frame, test the operation of the doors. Open and close them several times to ensure they swing smoothly and latch properly. If the doors bind or rub against the frame, adjust the shims as needed. Use a utility knife to trim any excess shims that protrude beyond the frame. Fill any gaps between the frame and the wall with insulation to prevent drafts and improve energy efficiency.
Install the door handles and latch hardware according to the manufacturer's instructions. Ensure the strike plate is properly aligned with the latch bolt for smooth and secure operation. Adjust the strike plate if necessary to ensure the door latches correctly. Consider the placement of the handles and their accessibility, especially if the doors are frequently used.
Finishing Touches
The final stage involves adding the finishing touches to complete the installation and enhance the appearance of the new French doors. This includes caulking, applying trim, and painting or staining the doors and frame.
Apply caulk around the perimeter of the door frame where it meets the wall. This seals any gaps and prevents air and moisture from entering. Use a high-quality, paintable caulk and apply it smoothly and evenly. Remove any excess caulk with a damp cloth. Caulking not only improves the appearance of the installation but also enhances its energy efficiency.
Install trim or molding around the door frame to conceal any gaps and provide a finished look. Choose trim that complements the style of the doors and the overall decor of the home. Measure and cut the trim pieces accurately using a miter saw. Attach the trim to the frame using finishing nails. Fill any nail holes with wood filler and sand them smooth before painting or staining.
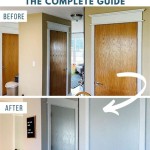
If the doors and frame are unfinished, apply paint or stain to protect the wood and enhance its appearance. Prepare the surface by sanding it lightly and applying a primer. Choose a paint or stain that is suitable for interior use and that complements the existing decor. Apply the paint or stain in thin, even coats, allowing each coat to dry thoroughly before applying the next. Consider the color and finish of the paint or stain, as these can significantly impact the overall aesthetic of the installation.
Check the weather stripping or weather sealant around the door. This is a crucial part of the installation. If this is not installed than you can encounter drafts that will reduce the energy efficiency of the door and increase the cost of heating and cooling the house during the hot and cold seasons.

French Doors In My Entry Creations By Kara

French Door Makeover Part Two Diy Casing

The Ultimate Guide To Choosing Interior French Doors Decoholic

How To Turn A Bi Fold Door Into French Doors Diy Closet Makeover

How To Replace Windows With French Doors Diy Network

The Ultimate Guide To Choosing Interior French Doors Decoholic

Installing Flush Bolt On Bedroom Double Doors

The Ultimate Guide To Choosing Interior French Doors Decoholic

43 Stylish Interior Glass Doors Ideas To Rock Digsdigs

Replace Window With French Doors Cost In 2025 Checkatrade
Related Posts