How To Replace An Interior Door With Frame
Replacing an interior door and frame can significantly enhance a home's aesthetics and functionality. This comprehensive guide outlines the process, providing detailed instructions for a successful installation.
Necessary Tools and Materials: Before beginning, gather the necessary tools and materials. These typically include a reciprocating saw, pry bar, hammer, measuring tape, safety glasses, work gloves, shims, screws, wood filler, caulk, paint, a new pre-hung door unit (including frame, door, and hinges), and potentially a new door handle and latch set.
Step 1: Measuring the Existing Doorway: Accurate measurements are crucial. Measure the width of the existing doorway at three points: the top, middle, and bottom. Record the smallest measurement. Repeat this process for the height of the doorway. These measurements will determine the correct size of the new pre-hung door unit to purchase.
Step 2: Removing the Existing Door and Frame: Begin by removing the door from its hinges. This is typically accomplished by tapping out the hinge pins with a hammer and nail set or screwdriver. Once the door is removed, use a utility knife to score the caulk or paint seal between the existing frame and the wall. This will prevent damage to the surrounding drywall during removal.
Step 3: Removing the Existing Frame: Use a reciprocating saw to cut through the vertical jambs of the existing frame, several inches above the floor. Be cautious not to cut into the surrounding wall studs. Use a pry bar to carefully remove the jamb pieces and the head jamb. Remove any remaining nails or screws from the surrounding wall studs.
Step 4: Preparing the Opening: Inspect the rough opening for any damage or irregularities. If necessary, use shims or wood filler to create a smooth and plumb surface. Vacuum or sweep the area to remove any debris.
Step 5: Installing the New Pre-Hung Door Unit: Carefully position the new pre-hung door unit into the rough opening. Use a level to ensure the unit is plumb and square. Insert shims between the frame and the wall studs at regular intervals along both sides and the top. These shims will help to maintain the proper alignment and create a solid installation.
Step 6: Securing the Frame: Once the frame is plumb and square, drive screws through the shims and into the wall studs, securing the frame in place. Be careful not to overtighten the screws, as this can warp the frame. Trim any excess shim material using a utility knife.
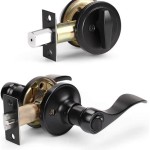
Step 7: Installing the Door Handle and Latch: If the new pre-hung door unit doesn't include a pre-installed handle and latch, follow the manufacturer's instructions to install these components. Ensure the latch plate and strike plate align correctly.
Step 8: Applying Caulk and Filling Gaps: Apply a bead of caulk around the exterior perimeter of the frame, where it meets the wall. This will seal any gaps and prevent drafts. Fill any nail holes or screw heads with wood filler. Allow the caulk and wood filler to dry completely.
Step 9: Painting and Finishing: Once the caulk and wood filler are dry, paint or stain the door and frame as desired. Multiple coats may be necessary for optimal coverage and durability. Allow sufficient drying time between coats.
Testing the Door's Functionality: After the paint or stain has dried completely, test the door's operation. Ensure it swings freely and latches securely. Adjust the strike plate if necessary.
Considerations for Different Wall Types: The installation process may vary slightly depending on the wall construction. Consult a professional for specific guidance if working with non-standard wall types.
Importance of Proper Shimming: Proper shimming is critical for a successful door installation. It ensures the door operates smoothly and prevents binding or sticking.
Disposing of Old Materials: Dispose of the old door, frame, and other construction debris according to local regulations.
Safety Precautions: Always wear safety glasses and work gloves when using power tools or handling sharp materials. Follow manufacturer's instructions for all tools and materials.

How To Hang An Interior Door Tips And Guidelines Howstuffworks

How To Replace An Interior Door Prehung Replacement Diy Family Handyman

How To Install A Pre Hung Interior Door For The First Time Like Pro

How To Install An Interior Door The Home Depot

Easy Pre Hung Door Installation

The Easy Way To Remove A Door Frame And Make Money Ing It

Removing Or Replacing An Interior Door

How To Install A Pre Hung Interior Door

How To Remove And Install A Pre Hung Door Diy Homeimprovement

Updating Interior Doors Everything You Need To Know Checkatrade
Related Posts


