Installing an interior prehung door can be a daunting task, but with the right knowledge and tools, it can be done with ease. This article will provide a detailed, step-by-step guide to help you install your interior prehung door properly and safely.
Tools and Materials Needed
Before you get started, you’ll need to gather the following tools and materials:
- Measuring tape
- Pencil
- Power drill
- Hammer
- Shims
- Interior prehung door
- Door hinges
- Screws
- Door knob
Step 1: Measure the Door Opening
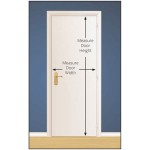
The first step is to measure the door opening so you can ensure an accurate fit for your door. Measure the width and height of the door opening at the top, middle, and bottom. If the measurements are not consistent, you will need to make adjustments to ensure a proper fit.
Step 2: Prepare the Door Frame
Next, you’ll need to prepare the door frame. This includes removing any existing trim and nails, as well as filling any holes or cracks. You may also need to sand the frame down to ensure a smooth surface.
Step 3: Install the Door Hinges
Once the door frame is ready, you can install the door hinges. Place the hinges on the door frame and use a power drill to secure them in place. Make sure the hinges are level and secure.
Step 4: Install the Door
Once the hinges are in place, you can install the door. Place the door in the door frame and use shims to make sure it is level and secure. Then, use a hammer to drive the shims into the frame. Once the door is secure, you can use a power drill to attach the hinges to the door.
Step 5: Install the Door Knob
Finally, you can install the door knob. Place the door knob on the door and use a power drill to secure it in place. Once the knob is secure, your interior prehung door is ready to use.


Related Posts


