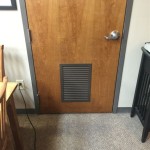
Hanging an interior door is a relatively simple process, but it takes some skill and knowledge to do it right. If you’re replacing a door or installing a new one, you want to make sure it fits snugly in the frame and that it opens and closes properly.
Gather the Tools
Before you start hanging your interior door, you’ll need to gather the right tools. You’ll need:
- A level
- Measuring tape
- Hammer
- Screwdriver
Measure and Cut the Door
Once you have the right tools, it’s time to measure and cut the door. Start by measuring the height, width, and thickness of the door frame and then measure the door itself. You’ll want to make sure the door is slightly smaller than the frame so it fits snugly. Then, use a saw to cut the door to the right size.
Hang the Door
Once you’ve cut the door, it’s time to hang it. Start by placing the door in the door frame with the hinges against the frame. Make sure the door is level with the frame and mark the holes for the hinges. Then, use a drill to make the holes for the screws and secure the door in place.
Install the Door Knob and Lock
Once the door is hung, you’ll need to install the door knob and lock. Start by using a screwdriver to install the latch plate on the door frame. Then, install the door knob on the door. Finally, secure the lock in place with screws and test the lock to make sure it works properly.
Finishing Touches
Once the door is hung and the lock is in place, it’s time to make sure everything looks right. Check the door for any loose screws or gaps and tighten them up if necessary. Then, check the door’s alignment with the frame and adjust it if needed. Finally, add any finishing touches like weather stripping or a door sweep to make sure the door is properly sealed.


Related Posts


