How To Install 6 Panel Interior Doors in Jamaica
Installing a new interior door, particularly a 6-panel door which is a popular choice in many Jamaican homes, can significantly enhance the aesthetic appeal and functionality of a room. While professional installation is always an option, this article provides a comprehensive guide for homeowners in Jamaica who prefer a DIY approach. The process requires careful planning, accurate measurements, and a degree of carpentry skill. By following these instructions, you can successfully install a 6-panel interior door and enjoy the results of your labor.
Before beginning the installation, it is crucial to gather all necessary tools and materials. This initial preparation ensures a smooth and efficient workflow, reducing potential delays and minimizing errors. The required tools and materials typically include:
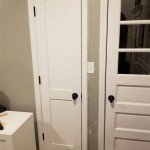
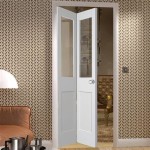
*New 6-panel interior door (ensure correct size and swing direction)
*Door jamb kit (including pre-mitered or plain jambs in desired material, such as pine or mahogany)
*Door hinges (typically three hinges are recommended for standard interior doors)
*Door hardware (door knob, latch, strike plate)
*Wood shims
*Construction adhesive
*Finishing nails or screws
*Wood filler (for patching nail holes)
*Paint or stain (to match existing trim or desired aesthetic)
*Measuring tape
*Level (2-foot and 4-foot recommended)
*Hammer
*Screwdriver (Phillips and flathead)
*Power drill with drill bit set
*Wood chisel
*Utility knife
*Miter saw (for cutting jambs if not pre-mitered)
*Hand plane or power planer (for fine adjustments)
*Safety glasses
*Work gloves
Having these tools and materials readily available streamlines the installation process and contributes to a professional-looking finished product. The choice of materials like the jamb and the door itself, can vary depending on the desired look and budget. Mahogany may be preferred for its durability and rich appearance, while pine offers a more cost-effective option.
Key Point 1: Preparing the Door Frame
The existing door frame, or rough opening, must be properly prepared before installing the new door. This preparation involves assessing the frame for squareness, plumb, and level, and making any necessary adjustments to ensure the new door will fit correctly and operate smoothly. This is crucial for avoiding issues like the door sticking or not closing properly.
Begin by removing the old door, hinges, and any remaining hardware from the existing frame. Use a utility knife to score the paint along the edges of the old frame to prevent chipping the surrounding wall. Carefully pry off the old frame using a pry bar, taking care not to damage the wall. Remove any old nails or screws, and clean the rough opening of debris.
Next, inspect the rough opening for squareness. Use a level to check if the jambs are plumb (perfectly vertical) and the head jamb is level (perfectly horizontal). Measure the diagonals of the opening. If the diagonals are equal, the opening is square. Minor imperfections can be corrected using shims. For more significant discrepancies, the opening may need to be adjusted by adding or removing framing lumber.
If installing a new door jamb kit, carefully assemble the jambs according to the manufacturer's instructions. If the jambs are not pre-mitered, use a miter saw to cut the head jamb and side jambs at a 45-degree angle where they meet. Apply construction adhesive to the mitered joints and secure them with finishing nails or screws. Ensure the assembled jamb is the correct width and height for the door and the rough opening.
Insert the assembled door jamb into the rough opening. Use shims to plumb the side jambs and level the head jamb. Place shims behind the jambs at the hinge locations, latch location, and strike plate location. Secure the jamb to the framing using finishing nails or screws driven through the shims. Check again for plumb, level, and square before completely fastening the jamb. Once the jamb is securely in place, trim the excess shims with a utility knife.
Key Point 2: Hanging the Door
Hanging the door involves attaching the hinges to both the door and the jamb, ensuring proper alignment and smooth operation. This step requires precision and attention to detail to avoid problems with the door binding or not closing correctly. Proper hinge placement is essential for a well-functioning door.
Begin by marking the hinge locations on both the door and the jamb. Typically, three hinges are used for standard interior doors. The top hinge is usually placed approximately 7 inches from the top of the door, the bottom hinge is placed approximately 11 inches from the bottom of the door, and the middle hinge is placed evenly between the top and bottom hinges. Use a marking knife and a combination square to ensure accurate and consistent markings.
Using a chisel and hammer, carefully mortise the jamb and the door to create recesses for the hinges to sit flush with the surface. The depth of the mortise should match the thickness of the hinge leaf. A router with a mortising jig can also be used for this purpose. Take care not to over-chisel or create a mortise that is too deep, as this will affect the door's fit and alignment.
Attach the hinges to the door and the jamb using wood screws. Ensure the screws are properly sized and do not strip the screw holes. Pre-drilling pilot holes can help prevent splitting the wood. When installing the hinges, make sure the hinge pins are aligned vertically to allow for smooth door operation. Confirm that the door swings in the desired direction before tightening all the screws.
Carefully lift the door into place and align it with the installed hinges. Insert the hinge pins to connect the door to the jamb. Check the door for proper alignment and operation. The door should swing freely without binding or rubbing against the jamb. If the door binds, use shims to adjust the jamb until the door operates smoothly. Slight adjustments can also be made by planing or sanding down high spots on the door edge.
Key Point 3: Installing Door Hardware
Installing the door hardware, including the doorknob, latch, and strike plate, completes the installation process and allows the door to be securely closed and latched. This step requires careful measurements and precise drilling to ensure the hardware functions correctly. A properly installed doorknob and latch provide both security and convenience.
Follow the manufacturer's instructions for installing the doorknob and latch. Typically, this involves drilling a hole through the door according to the specified diameter for the doorknob and latch assembly. Use a hole saw or spade bit to drill the hole, ensuring it is centered on the door's edge.
Insert the latch mechanism into the hole in the door's edge and secure it with screws. Align the doorknob spindles with the latch mechanism and install the doorknob handles on both sides of the door. Tighten the screws to secure the doorknob assembly in place. Test the doorknob and latch to ensure they operate smoothly and correctly. The latch should retract easily when the doorknob is turned.
Close the door and mark the location of the latch bolt on the jamb. This mark indicates where to install the strike plate. Use a chisel and hammer to mortise the jamb to create a recess for the strike plate to sit flush with the surface. Ensure the mortise is deep enough to allow the latch bolt to fully engage with the strike plate.
Attach the strike plate to the jamb using wood screws. Test the door to ensure the latch bolt engages properly with the strike plate. If the latch bolt does not engage fully, adjust the position of the strike plate or deepen the mortise as needed. Once the strike plate is properly installed, the door should close securely and latch easily.
After the door is hung and the hardware is installed, inspect the entire installation for any imperfections or areas that need adjustment. Check for gaps between the door and the jamb, and use weather stripping to seal any gaps. Fill any nail holes or screw holes with wood filler and sand them smooth. Apply paint or stain to match the existing trim or desired aesthetic. Ensure the door operates smoothly and all hardware functions correctly. Clean up any debris from the work area and dispose of waste materials properly.
Installing a 6-panel interior door requires patience, attention to detail, and a moderate level of carpentry skill. By carefully following these instructions, homeowners in Jamaica can successfully install a new door and enhance the look and functionality of their homes. Taking thorough measurements and making accurate cuts are essential for a professional-looking result. Remember to prioritize safety by wearing safety glasses and work gloves throughout the installation process.

32x80 Pine 6 Panel Door Total Hardware Supplies

24x80 Pine 6 Panel Door Total Hardware Supplies

Panel Pine Door Ibi 36 X80 Greenwood Plaza

Panel Pine Door Ibi 36 X80 Greenwood Plaza

Poplar Interior Door Slab 6 Panel Pease Doors The

Poplar Interior Door Slab 6 Panel Pease Doors The

How To Install Interior Doors

Six Piece Self Adhering Door Moulding Kit Luxe Architectural

Six Panel Door With Bottom Vent Olde Good Things

Nova 1 Panel Soft White Laminated Traditional Interior Door
Related Posts