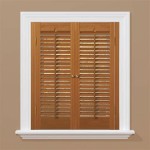
How to Trim an Interior Door Frame
Trimming an interior door frame is a common home improvement project that can significantly enhance the aesthetics and functionality of your home. It involves adding decorative molding around the existing door frame, covering any imperfections and creating a finished look. This project can be tackled by homeowners with basic DIY skills and the right tools. This article provides a comprehensive guide to trimming an interior door frame, covering the necessary steps and important considerations.
1. Preparation and Tools
Before starting the project, ensure you have the necessary tools and materials:
- Measuring tape: To accurately measure the door frame dimensions.
- Miter saw: For precise cuts of the molding.
- Nail gun: To secure the molding to the frame.
- Finishing nails: To attach the molding.
- Wood glue: To reinforce the molding.
- Caulk: To seal any gaps between the molding and frame.
- Putty knife: To smooth out the caulk.
- Sandpaper: To smooth out any rough edges.
- Primer and paint: To match the existing door frame and trim.
- Safety glasses and gloves: For protection during the project.
Choose the type of molding that suits your style and preferences. Common options include:
- Casing: A simple, rectangular profile that provides a clean, classic look.
- Baseboard: A thicker, more decorative molding that adds visual interest.
- Crown molding: A decorative molding that is installed at the junction of the wall and ceiling.
Ensure you purchase enough molding to cover the entire door frame. Consider adding an extra 10% to account for cuts and mistakes.
2. Measuring and Cutting the Molding
Accurate measurements are crucial for a well-fitted trim. First, measure the length and width of each side of the door frame, taking into account any existing trim. Then, carefully cut the molding to the desired lengths using the miter saw.
To create precise 45-degree angles for the corners, use the miter saw's angle adjustment feature. This ensures the trim pieces fit together seamlessly. Remember to always make test cuts on scrap wood before cutting the final molding.
3. Installing the Molding
Start by attaching the molding to the side jambs of the door frame. Apply a thin layer of wood glue along the back of the molding, then position it against the jamb. Using a nail gun, secure the molding with finishing nails. Space the nails evenly and avoid driving them too deep to prevent damaging the molding.
Next, install the molding on the top jamb and the head jamb, making sure to miter the corners precisely. Remember to apply wood glue and secure the molding with finishing nails.
For a seamless appearance, use a caulking gun to apply a layer of caulk along the seams between the molding and the frame. Smooth out the caulk with a putty knife for a clean finish.
4. Finishing Touches
Once the molding is installed, use sandpaper to sand down any rough edges or imperfections. Then, prime the molding with a primer that matches the existing paint color of the door frame. Allow the primer to dry completely before painting the trim with two coats of paint for a durable and polished finish.
Allow the paint to dry thoroughly before using the door. Avoid touching the trim until the paint is completely dry to prevent smudging or damaging the finish.

How To Trim A Door In 10 Minutes

Frame And Mouldings Modern Interior Doors By Milanodoors

Fancy But Easy Diy Door Trim Design Plus Seven Variations And How To Create Them Interior Frame Molding Trendy

How To Install Door Trim The Home Depot

Finishing Door Frame Trim Doityourself Com Community Forums

How To Make Your Doors Look Custom By Installing Door Headers

How To Add Decorative Trim Door Frames The Painted Hive
Transoms For Interior Doors Jlc

How To Add Decorative Trim Door Frames The Painted Hive

Installing A Pre Hung Door The Easy Way And T Out Aka Adding Molding Make It Love
Related Posts


