How to Replace an Interior Door Jamb
Replacing an interior door jamb is a relatively simple carpentry project that can be completed in a few hours. By following these step-by-step instructions, you can save money and give your home a fresh new look.
Tools and Materials You'll Need:
* Pry bar * Hammer * Measuring tape * Level * Circular saw or miter saw * Jigsaw * Caulk gun * Caulk * New door jambStep 1: Remove the Old Jamb
Use a pry bar to carefully remove the old door jamb from the wall. Start at the top of the jamb and work your way down, being careful not to damage the wall.
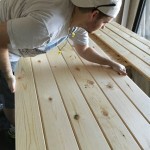
Step 2: Measure and Cut the New Jamb
Measure the height and width of the door opening. Cut the new door jamb to the correct size using a circular saw or miter saw. Make sure the jamb is square by using a level.
Step 3: Cut the Jamb for the Hinge Mortises
If the new door jamb does not have hinge mortises, you will need to cut them yourself. Use a jigsaw to cut the mortises according to the manufacturer's instructions.
Step 4: Install the New Jamb
Apply a bead of caulk around the perimeter of the door opening. Set the new door jamb in place and secure it with screws. Make sure the jamb is level and square.
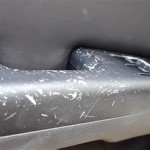
Step 5: Caulk the Jamb
Apply a bead of caulk around the perimeter of the jamb where it meets the wall. Use a caulk gun to smooth the caulk and remove any excess.
Step 6: Hang the Door
Hang the door on the new jamb and adjust the hinges as necessary. Make sure the door opens and closes smoothly.
Step 7: Trim the Jamb
If the jamb is too wide or too long, you can trim it using a circular saw or miter saw. Be careful not to cut the jamb too short or too narrow.
Tips:
* If you are replacing a door jamb in a bathroom, make sure to use a waterproof jamb. * If you are not comfortable cutting the jamb yourself, you can have it cut at a home improvement store. * Be careful not to overtighten the screws when installing the jamb. * Allow the caulk to dry completely before using the door.
How To Install Or Replace A Door Frame Homeserve Usa

How To Hang An Interior Door Tips And Guidelines Howstuffworks

How To Install An Interior Door The Home Depot

Installing A Prehung Interior Door Jamb Switch Rogue Engineer

How To Replace A Door Frame Yourself

How To Repair Replace Broken Door Jamb Fix Interior And Casing Easy

Install Or Replace Interior Doors Lowe S

How To Repair A Door Frame 5 Ways Fix And Replace Jambs

Door Frame And Jamb Removal Diy

Troubleshooting A Prehung Door Installation Fine Homebuilding
Related Posts