How To Repair Car Interior Door Trim Panel Clips: Replacement Cost and Procedures
The interior door trim panel, a crucial element of a vehicle's cabin, significantly contributes to aesthetics, insulation, and overall comfort. This panel is typically secured to the door frame using a series of plastic clips. Over time, these clips can become brittle, break, or detach, leading to loose or rattling door panels. Replacing these clips is a common and often necessary maintenance task that can restore the integrity and sound insulation of the vehicle's interior.
This article provides a comprehensive guide to repairing car interior door trim panel clips, covering the required tools, step-by-step procedures, and an overview of the replacement cost. Understanding these aspects will empower vehicle owners to address this issue effectively, whether by performing the repair themselves or making informed decisions when seeking professional assistance.
Identifying Damaged or Missing Door Trim Panel Clips
The first step in addressing a loose or rattling door trim panel is to accurately diagnose the problem. This involves a careful inspection of the panel and its attachment points to the door frame. Several indicators suggest that clips are damaged or missing:
Loose or Sagging Panel: A primary symptom is a perceptible looseness or sagging of the trim panel, particularly along the edges or bottom. The panel may move excessively when touched or when the door is closed.
Rattling or Vibrating Noises: Damaged or missing clips can cause the trim panel to vibrate against the door frame, producing annoying rattling or buzzing noises, especially while driving on uneven surfaces.
Visible Gaps: Upon close inspection, gaps may be visible between the trim panel and the door frame, indicating that the panel is not properly secured.
Physical Evidence: Examining the back of the trim panel and the corresponding mounting points on the door frame may reveal broken clip fragments or empty clip receptacles. This provides visual confirmation of the issue.
Once damaged or missing clips are identified, the appropriate replacement clips can be sourced. It’s essential to select clips that are specifically designed for the vehicle's make, model, and year to ensure a proper fit and secure attachment.
Tools and Materials Required for Door Trim Panel Clip Replacement
Successfully replacing door trim panel clips requires a few essential tools and materials. Having these items readily available will streamline the repair process and minimize potential damage to the trim panel or door frame. The necessary items include:
Trim Panel Removal Tool: This specialized tool is designed to safely pry the trim panel away from the door frame without causing damage to the panel or its surrounding surfaces. It typically features a wide, flat blade with a forked or angled tip to grip the clips. A plastic or nylon construction is preferred to minimize the risk of scratching the paint or interior surfaces.
Screwdrivers: A set of screwdrivers, including both Phillips-head and flat-head variations, may be needed to remove any screws or fasteners that secure the trim panel in addition to the clips. The appropriate size screwdriver is crucial to prevent stripping the screw heads.
Pliers: Pliers, particularly needle-nose pliers, can be useful for removing broken clip fragments from the door frame or trim panel. They can also assist in positioning new clips during installation.
Replacement Clips: The most important item is a set of replacement clips that are specifically designed for the vehicle's make, model, and year. These clips can be purchased from automotive parts stores, online retailers, or the vehicle manufacturer. Ensuring the correct fit is paramount for a secure and reliable repair.
Gloves: Wearing gloves will protect hands from sharp edges and potential contaminants during the repair process.
Shop Towels or Rags: These are useful for cleaning the trim panel and door frame, as well as for wiping away any debris or lubricant.
Optional Tools: A heat gun (used cautiously) can sometimes help soften brittle plastic clips for easier removal. A small hammer or mallet can be used to gently tap the trim panel back into place after the new clips are installed.
Step-by-Step Procedure for Replacing Door Trim Panel Clips
The process of replacing door trim panel clips typically involves the following steps. These steps should be followed carefully to avoid damaging the trim panel or door frame.
Preparation: Begin by gathering all the necessary tools and materials. Park the vehicle in a well-lit area and ensure adequate workspace around the door.
Panel Removal: Use the trim panel removal tool to carefully pry the trim panel away from the door frame. Start at one corner and work your way around the perimeter, applying gentle pressure to release the clips. If any screws or fasteners are present, remove them using the appropriate screwdriver before attempting to detach the panel. It is crucial to exert even pressure to prevent bending or cracking the trim panel during the removal process.
Clip Inspection and Removal: Once the trim panel is removed, inspect the back of the panel and the door frame for any remaining clip fragments. Use pliers or a screwdriver to remove any broken pieces. Be careful not to scratch or damage the mounting surfaces.
Clip Installation: Attach the new replacement clips to the trim panel. Ensure that the clips are properly aligned with the mounting holes on the door frame. Some clips may require a slight push or twist to lock into place. Verify that the clips are securely attached to the trim panel before proceeding.
Panel Reinstallation: Carefully align the trim panel with the door frame, ensuring that all the clips are properly positioned. Gently push the trim panel back into place, applying even pressure to engage the clips. Listen for a distinct "snap" as each clip secures itself to the door frame. If any screws or fasteners were removed during the initial removal process, reinstall them at this point.
Testing and Inspection: After the trim panel is reinstalled, test its stability by gently pushing and pulling on it. Ensure that it is securely attached and that there are no gaps or loose areas. Close the door and listen for any rattling or vibrating noises. If necessary, repeat the clip replacement process for any remaining loose areas.
Clean Up: Wipe down the trim panel and door frame with a clean shop towel to remove any fingerprints or debris. Dispose of any broken clip fragments or used materials properly.
This process may vary slightly depending on the specific vehicle make and model. Consulting a vehicle-specific repair manual or online resources can provide detailed instructions and diagrams for the particular door trim panel being repaired.
Factors Influencing Door Trim Panel Clip Replacement Cost
The cost of replacing door trim panel clips can vary depending on several factors. Understanding these factors will help vehicle owners budget for the repair and make informed decisions about whether to perform the repair themselves or seek professional assistance.
Type of Clips: The type of clips required for the vehicle can significantly impact the cost. Some vehicles use relatively inexpensive, generic clips, while others require specialized or OEM (Original Equipment Manufacturer) clips that can be more expensive. The material and design complexity of the clips also contribute to the price.
Number of Clips: The number of clips that need to be replaced will directly affect the total cost. If only a few clips are damaged or missing, the cost will be lower than if a significant number of clips need replacement.
DIY vs. Professional Repair: Performing the repair yourself can save on labor costs, but it requires purchasing the necessary tools and materials. Professional repair services will include labor costs, which can vary depending on the hourly rate of the mechanic and the complexity of the repair.
Vehicle Make and Model: The make and model of the vehicle can influence the cost of the clips and the labor involved in the repair. Some vehicles have more complex door trim panel designs, which can require more time and expertise to remove and reinstall.
Location: Labor rates and the availability of parts can vary depending on the geographic location. Repair costs may be higher in urban areas or regions with limited access to automotive parts suppliers.
Material Cost: Replacement clips typically cost between $0.50 to $5.00 each, depending on the vehicle and the type of clip. A pack of multiple clips can often be purchased for a lower price per clip.
Labor Cost: If a professional mechanic performs the repair, labor costs can range from $50 to $150 per door panel, depending on the complexity of the job and the mechanic's hourly rate.
The total cost of replacing door trim panel clips can range from a few dollars for a DIY repair involving only a few inexpensive clips to several hundred dollars for a professional repair involving specialized clips and complex panel removal.
By understanding the factors that influence the cost and by carefully following the steps outlined in this guide, vehicle owners can effectively repair damaged or missing door trim panel clips and restore the integrity and appearance of their vehicle's interior.

Car Door Panel Clips Fixing Fastener 9mm Hole Interior Trim Parts

How To Replace Door Panel Clips On Your Truck Or Car

5pcs Auto Fastener Door Trim Panel Clips White Plastic Ret Blade Ph

Door Card And Interior Trim Panel Clips Ford 4831516

5pcs Auto Fastener Door Trim Panel Clips White Plastic Ret Blade Ph

Dropship 13 Pcs Car Trim Removal Tool Auto Door Panel Clip Dash Plastic Interior Radio Open Pry Kit To At A Lower Doba

Viktec Car Upholstery Trim Clip Plastic Fastener Door Panel Remover Tool For Automotive Audio Equipment Auto Removal Pad Made In China Com

Car Door Panel Clips Fixing Fastener 9mm Hole Interior Trim Parts

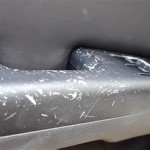
Car Interior Door Panel Armrest Repair In Los Angeles Ca

Advance Auto Parts Car Engine Batteries Brakes Replacement Performance Accessories
Related Posts