How To Paint a House Interior Fast
Interior painting represents a common home improvement project, frequently undertaken to refresh living spaces, increase property value, or simply reflect evolving aesthetic preferences. While the undertaking can appear daunting, especially when time is a constraint, employing efficient techniques and strategic planning can significantly accelerate the process without compromising the quality of the final result. Successful fast-track interior painting necessitates a comprehensive approach, encompassing meticulous preparation, thoughtful material selection, and the execution of streamlined painting methodologies.
The emphasis on speed should never supersede the importance of achieving a professional-looking finish. Proper preparation remains critical, as does employing the correct tools and techniques. Cutting corners in these areas will inevitably lead to future complications, potentially requiring rework and ultimately negating any initially perceived time savings.
Key Point 1: Streamlining Preparation for Rapid Results
Efficient preparation forms the cornerstone of any rapid painting project. This stage involves protecting surfaces, cleaning walls, and addressing any superficial imperfections. A meticulous approach at this stage will minimize the time required for actual painting and reduce the likelihood of needing to correct errors later. The objective is to create a smooth, clean, and receptive surface for the paint to adhere to.
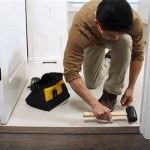
Begin by removing all movable objects from the room. This includes furniture, lamps, rugs, and wall decorations. If removing furniture is impractical, consolidate it in the center of the room and cover it securely with plastic sheeting. Employ drop cloths to protect flooring from paint splatters. Canvas drop cloths offer superior durability and protection compared to plastic alternatives and are less prone to shifting. Secure the drop cloths at the edges with painter’s tape to prevent them from moving during the painting process.
Next, meticulously tape off all trim, windows, doors, and other areas not intended to be painted. Use high-quality painter’s tape designed for interior use. Press the tape firmly along the edges to create a tight seal and prevent paint bleed. For optimal results, consider using a specialized taping tool to ensure consistent pressure and a clean, straight line. This reduces the need for touch-ups later, saving considerable time.
Cleaning the walls is a crucial step often overlooked. Dust, dirt, and grease can impede paint adhesion and compromise the final finish. Use a damp sponge or cloth with a mild detergent solution to thoroughly clean all surfaces. Pay particular attention to areas prone to grease accumulation, such as kitchens and bathrooms. Rinse the walls with clean water and allow them to dry completely before proceeding.
Inspect the walls for any imperfections, such as holes, cracks, or dents. Fill these imperfections with spackle or joint compound. Apply the compound sparingly and smooth it flush with the surrounding surface. Allow the compound to dry completely according to the manufacturer's instructions. Once dry, sand the patched areas smooth using fine-grit sandpaper. Wipe away any sanding dust with a clean, damp cloth.
Priming the walls is often essential, especially when painting over dark colors, glossy surfaces, or bare drywall. Primer creates a uniform surface that improves paint adhesion and enhances color coverage. Apply a coat of high-quality primer using a roller or brush. Allow the primer to dry completely before applying the paint. Tinting the primer towards the finish paint color can further improve coverage and potentially reduce the number of paint coats required, contributing to faster painting.
Key Point 2: Selecting the Right Tools and Materials for Speed and Efficiency
The choice of tools and materials significantly impacts the speed and efficiency of the painting process. Investing in high-quality brushes, rollers, and paint can save time and improve the final result. Selecting the appropriate paint type for the specific application is equally important. Using premium products may have a higher initial cost, but often provides better coverage, durability, and ease of application, resulting in long-term time and cost savings.
Opt for high-quality paint brushes made with synthetic filaments for latex paints and natural bristles for oil-based paints. Invest in a variety of brush sizes to accommodate different areas and tasks. Angled brushes are particularly useful for cutting in along trim and corners. A comfortable handle is also essential for prolonged use. Clean high-quality brushes appropriately after each coat to extend their life and ensure consistent performance.
Select high-quality roller covers with the appropriate nap length for the surface being painted. Shorter nap rollers are suitable for smooth surfaces, while longer nap rollers are ideal for textured surfaces. Using premium roller frames with extension poles allows for faster coverage of large areas and eliminates the need to constantly bend or climb a ladder. Have multiple roller covers on hand to switch out as needed when changing colors or paint types.
Consider using a paint sprayer for large, flat surfaces. Paint sprayers can significantly accelerate the painting process, especially for ceilings and large walls. However, they require practice and proper technique to avoid drips, runs, and uneven coverage. Ensure proper ventilation and wear appropriate safety gear, including a respirator and eye protection, when using a paint sprayer.
Choose a paint with good coverage and a fast drying time. Latex paints are generally preferred for interior painting due to their low odor, ease of cleanup, and durability. Select a paint with a low VOC (volatile organic compound) content for improved air quality. Consider using a paint-and-primer-in-one product to potentially reduce the number of coats required. Ensure the selected paint is appropriate for the specific area being painted (e.g., moisture-resistant paint for bathrooms).
Invest in time-saving tools such as paint can lid openers, paint mixing sticks, and roller trays with liners. These small tools can streamline the painting process and reduce cleanup time. Also, consider using a paint grid in the paint bucket instead of a roller tray to reduce the amount of paint used and the frequency of refilling the roller. This also allows for a more even distribution of paint on the roller.
Key Point 3: Employing Efficient Painting Techniques
Efficient painting techniques are paramount for completing the project quickly and effectively. This encompasses proper brushwork, roller techniques, and strategies for minimizing drips and errors. Consistency in application and a systematic approach will ensure a uniform finish and reduce the need for touch-ups. The aim is to maximize coverage with each stroke and minimize wasted time and effort.
Start by "cutting in" along the edges of the room. Cutting in involves painting a narrow strip along the trim, ceiling, and corners using a brush. This creates a clean, defined edge and prevents the roller from bumping into these areas. Use a high-quality angled brush and apply the paint smoothly and evenly. Avoid applying too much paint at once to prevent drips and runs. Paint the cut-in areas before rolling to allow them to dry slightly and provide a better surface for the roller to blend into.
When rolling, use a consistent technique to ensure even coverage. Load the roller evenly with paint, avoiding excessive saturation. Roll the paint onto the wall in a "W" or "M" pattern, overlapping each stroke slightly. This helps to distribute the paint evenly and prevent streaks. Maintain a wet edge to avoid lap marks. Use light pressure and avoid pressing too hard on the roller. Work in manageable sections and reload the roller frequently.
Minimize drips and runs by avoiding over saturation of the brush or roller. If drips or runs occur, immediately wipe them away with a clean, damp cloth. Avoid painting in direct sunlight or in excessively humid conditions, as this can affect the drying time and paint adhesion. Ensure proper ventilation in the room to promote faster drying.
Allow each coat of paint to dry completely before applying the next coat. Follow the manufacturer's instructions for drying times. Applying subsequent coats of paint before the previous coat is fully dry can result in peeling, blistering, or uneven coverage. Once the paint is dry, carefully remove the painter’s tape. Pull the tape away from the painted surface at a 45-degree angle to prevent peeling the paint. If any paint has bled under the tape, use a small brush to touch up the areas with a matching paint color.
Clean brushes and rollers immediately after use with soap and water for latex paints and mineral spirits for oil-based paints. Properly storing brushes and rollers will extend their lifespan and ensure they are ready for future painting projects. Dispose of used paint cans and materials responsibly according to local regulations.
Ultimately, painting a house interior quickly requires a blend of careful planning, efficient techniques, and the use of appropriate tools and materials. Prioritizing preparation and avoiding shortcuts will lead to a faster and more satisfying result.

Diy Interior Wall Painting Tips Techniques With Pictures Family Handyman

How To Paint A Room Fast S For Homeowners

How Long To Paint A House Interior Localpainter Florida

Diy Interior Wall Painting Tips Techniques With Pictures Family Handyman

Diy Interior Wall Painting Tips Techniques With Pictures Family Handyman

How To Paint A Room The Home Depot

Diy Interior Wall Painting Tips Techniques With Pictures Family Handyman

How To Paint Walls Fast Salvaged Living

How To Paint A Room Quickly And Easily

The Goof Proof Way To Paint A Room Fast Deeply Southern Home
Related Posts